1T1 Endurance Guide to Rucking
Rucking is having its moment, and I couldn’t be happier about it! I have seen more athletes adding weight to their workouts on Strava and endurance coaches prescribing rucks. Local trail races are adding rucking to their existing events. I used rucking extensively last year to help with my recovery after a broken leg. Now, it’s just a normal part of what I do. One friend of mine, whose body is no longer “enjoying” running like it used to, has found new life, health and fitness by rucking every morning!
But… What is rucking? Rucking, at its core, is walking or hiking while carrying extra weight in a backpack. If you ever went to school, you already have many miles of rucking experience. I recently picked up my daughter’s school backpack and was shocked to find she has been really carrying some heavy loads!
Most likely, you already have what you need to get started today. Find a backpack (that old school one will do for starters), find some weight (books, bottles, rocks, whatever…) and start walking!
Benefits of Rucking
As an endurance coach, I believe the #1 benefit of rucking is that you can do sufficient strength training while moving your body in the same manner as running. This means you don’t have to go to the gym to build a great foundation of strength, and you can actually count the miles in your weekly goals! By simply walking with extra weight, you will strengthen your whole posterior chain, core, upper back, as well as your feet and ankles. In addition, it’s easy to add specific strength training moves, since you are carrying a weight that can substitute for a sandbag, dumbbell, kettlebell or barbell.
Even greater is the fact that rucking provides all of these benefits with a significantly lower risk of injury than running, since it is low impact. Because the impact forces are so much less than running, rucking requires little, if any, warmup. As I age, I can not simply walk outside and start running. My knees will respond, and I won’t like what they have to say! But with rucking, I can simply load up and start walking.
*Disclaimer* If you run while rucking, everything about lower impact forces and lower risk of injury is not true! I do NOT recommend anything other than walking/hiking while rucking. As you start to get into rucking, you will find that those in Crossfit and other similar communities will RUN with additional weight.
As a coach, I have found rucking very helpful for athletes with low cardio fitness, who find running completely exhausting. If you struggle with your heart rate “going through the roof” into the unproductive heart rate zones, you might find it very easy to control your effort when rucking.
Rucking is also a way to supercharge your hiking in training. Ultra endurance athletes need to train for hiking, as all of them (even the elites) have to hike during these events. Since walking/hiking is a different movement than running, you must train for it to be the best all-around ultra endurance athlete you can be. If you practice this, it can equate to multiple minutes per mile while hiking during an event. Rucking is the best way to train for hiking for these events.
Rucking is extremely helpful in safely achieving the training goals necessary to become an ultra endurance athlete without running excessive unnecessary miles.
Rucking is one of the key secret weapons in 1T1 Endurance!
Rucking Gear
Picking a Rucksack
As previously mentioned, you can simply find a backpack (that old school one will do for starters), find some weight (books, bottles, rocks, whatever…) and start walking! The convenience of getting started with what you have is great, but it won’t take you long to find out why it’s good to invest in a proper rucksack. Once you add weight and longer time, you will notice a few things that you would like to improve on. Specifically, comfort, weight distribution and fit.

Purpose-built ruck bags address all of these issues, and can elevate your rucking experience from frustrating and uncomfortable to enjoyable. These are the key features to look for in a good rucksack:
- Padding: There should be ample padding in the shoulder straps and the back of the pack.
- Adjustability: The pack should have adjustments for the shoulder straps, both in length and sternum straps so you can tweak the fit in all directions.
- Proper weight distribution:
- If you throw weight into the bottom of a backpack, it will float from side to side causing issues with your form, potential chafing and additional wear and tear on the pack. Proper bags have compartments purpose made for loading with weight and keeping it secure.
- Hip Belt Some bags have hip belts which can offload most weight from your shoulders onto your hips. These are helpful once you start rucking more weight.
- Durability: The bag needs to be specifically made to haul excessive weight. In addition your bag will suffer extreme abuse during strength training movements (or when you just throw it down after a huge effort).
Some of the most popular bags are:
- GoRuck Rucker $250
- Wild Gym Ruck $235
- 5.11 Tactical $100+
- Mystery Ranch $200+
- Backpacking specific bags $150+
There are many more available, but the one thing you might notice about all of these is they are very expensive! If you do get serious about rucking, as I think you should, I recommend making this investment if possible.
Besides the cost of the bag itself, you also have to consider the cost of the weight which you are loading into the bag. The name brands sell cast iron plates which fit perfectly into compartments inside of the rucksack, but these plates cost anywhere from $3 a pound to over $4 a pound! While I might recommend investing in a very nice rucksack, I would never recommend paying that much for cast iron plates!
So, how can you acquire the weight you need more economically? The best options for saving money I can think of are (in no particular order):
- Plates are much cheaper on Amazon. Yes4All brand cast iron plates are just as heavy, and cost less than half as much per pound! $2 a pound or less
- Weight Vest + weights. I bought this weight vest on Facebook marketplace, and it came with 20 individual 1 pound sand bags which are super handy. I don’t use the vest, but I use the weights often. $1.50 per pound
- Dry Rice or Beans. As Dave Ramsey once said, “beans and rice, rice and beans,”. Bags of rice at the grocery come in tough plastic bags, and increments of 1lb, 5lb, 10lb, and sometimes more! They are moldable and soft as well! $0.75 per pound!
- Bricks. I remember seeing that the GoRuck company used to have big events where they would give out their awesome bags, and ask their participants to bring their own bricks. They even have instructions on taping up bricks so they don’t destroy your bag.
- Rocks. Dirt. Sand.
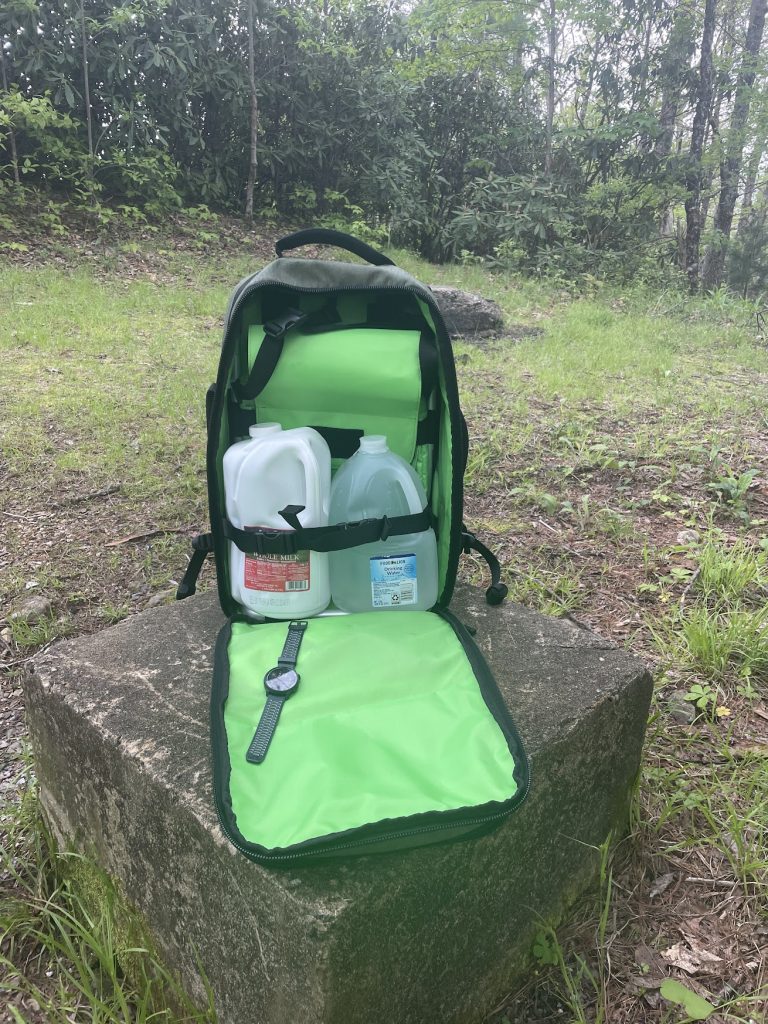
- Water Bottles or Jugs. *very handy for adding weight up a mountain, then emptying at the top*
So, picking your rucking bag and weight setup can be very costly. But as you can see there are ways to be frugal. I recommend starting rucking with what you have, or what you can find quickly and cheaply. Then, with experience you will start to consider the factors that you would like to improve upon first whether it be comfort, adjustability or durability.
My first setup was an REI daypack, which had nice thick shoulder straps, and some dumbbells I had lying around, wrapped in towels. Total cost, $0
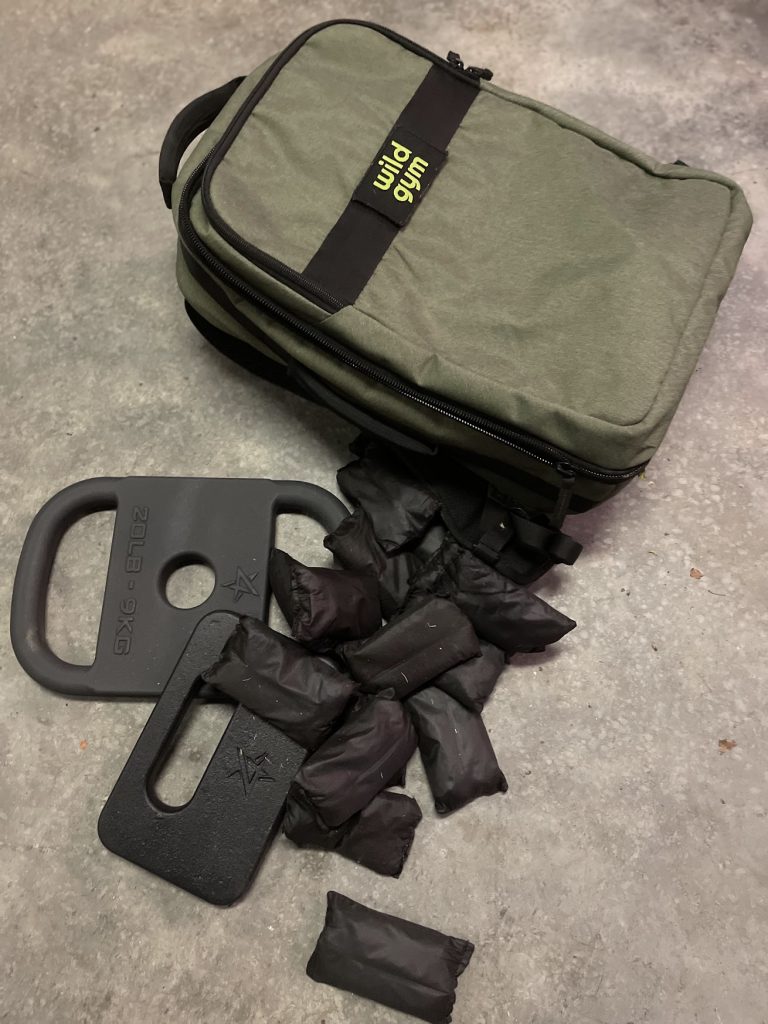
My current ruck setup is a Wild Gym Ruck loaded with Yes4All plates and 1lb. sand bags. Total cost, $240. I chose the Wild Gym over the GoRUCK for a few key reasons:
1 – Storage on the shoulder straps for phone and drink
2 – Versatility. The bag is designed with a strap system and a solid bottom which can be used to carry odd shaped items that don’t fit inside of the bag when zipped up
Will a Weighted Vest Work?
Yes, a weighted vest can work for rucking, especially at lower weight ranges. However, if you exceed 15-20 pounds, several challenges arise:
- Breathing Restrictions: The weight compresses your chest, making it harder to take full, deep breaths. A backpack-style ruck allows for unrestricted breathing.
- Weight Distribution: A vest pulls downward and forward, disrupting your posture. In contrast, a rucksack encourages a natural forward lean, promoting better balance and load management.
Picking Shoes for Rucking
Just like with running shoes, I avoid recommending specific footwear. Everyone is truly different in so many ways when it comes to feet and shoes. Here are some ideas for picking shoes for rucking:
- Trail Running Shoes: these shoes typically have a tougher sole, less cushion and extra reinforcement.
- Rucking Specific Shoes: GoRuck does make shoes specifically for rucking
- Rucking Boots: In true military fashion, many still prefer to use military style boots
I personally prefer to use trail running shoes with less aggressive tread.
Ruck Workouts
For beginning with rucking I recommend simply going for a walk with 10-15% of your bodyweight in your rucksack. I personally count the weight of my pack, as it can be a portion of the load. For example, 10% of bodyweight for a 150 pound athlete is 15 pounds. My bag weighs 4 pounds empty, so I would add 11 pounds of additional weight.
Once you have started, you will want to adjust some things to create the appropriate workout that you need. By adjusting any of the following variables, you can create workouts from easy to very difficult:
Speed. Slow walking or intentional faster walking. !! Again I DO NOT recommend running with weight! There is no known benefit to running with extra weight, and a higher risk of injury! There is a slightly different gait that some use, affectionately called the Ruck Shuffle, which is as fast as you would want to go.
Terrain. From flat, paved paths to rugged trails.
Grade. Steep Uphill. Virtual (treadmill) or Real Mountains!
Distance/Duration. Short or long? Quick walk or epic march?
Weight: Here are recommended weight ranges, based on percent of bodyweight.
- Beginners: 10%
- Faster Speed: 10-20%
- Hiking / Walking: 20-30%
- Uphill Only (either treadmill or up a long mountain climb): 10-15%
Example Workouts
So, by combining and tweaking these variables, we can create any number of different rucking workouts. Here are some example workouts to use regularly to create a well rounded rucking training plan.
- Just Walk lightweight: 10-20%: Go light if you are using rucking for a recovery activity. Think about taking the dog for a walk, or walking while talking on the phone. No speed, time, or distance goal. This could be a quick break or a long walk.
- Just Walk heavy: 20-30%+: Go heavy. Add more weight, and focus simply on moving the weight. No speed goal.
- Just Walk FAST: 10-20%: focus on walking as fast as you can without changing away from a walking/hiking gait. DO NOT RUN!
- Trail Ruck: 15-25%: Go ruck in the dirt! Or, just go backpacking 😉
- Go Long: Distance-focused rucks. Start light, 10-20% and increase weight and/or distance as you get stronger.
- Timed challenges: Take your previous normal results from other workouts and set a goal to improve on distance and/or weight.
- Go Up: 10-15%: 🤩 this one is my favorite! Climb a mountain, whether virtually on a treadmill or on a real mountain. Consider if you want to carry the same weight back DOWN the mountain if you aren’t on a treadmill. You can use water bottles or jugs for this to lighten the load at the top.
At the top of Rich Mountain. 2.7 miles : 1700 feet gain.
I dump the water out at the top…
Combo Workouts (Ruck-Strength Hybrids)
One of the neatest things about purpose-built rucksacks is that they are made to be held from all sides and they are tough as can be. You are literally carrying a weight that can substitute for a sandbag, dumbbell, kettlebell or barbell. Any strength move you can do with them can also be done with a ruck. Rucks are designed with handles to make the following moves easy: carries, rows, curls, press, squats, lunges, pulls, rows, situps and more!
And you can take your gym with you anywhere your feet can take you! By combining any of the Example Workouts from above with some of these strength moves, you can create a full body workout.
I am a huge fan of rucking for everyone, not just ultra endurance athletes. I’ve personally used the “Go Up” training mentioned above to prepare for epic mountain races and adventures, and use my ruck multiple times a week. If you have more questions, or feel like something is missing from this guide, send me a DM or an email (contact info at bottom of page). Perhaps you’d like to start rucking, and need some coaching guidance. I’d love to chat about rucking with you!